Introduction to git
What is git?
Git is a version control system. It is like Dropbox, but with the exception that changes to multiple files are ‘bundled’, instead of immediately synced per file change.
At the basic you have a folder with files. The folder is called a repository. Git watches all the files in the repository. It registers which lines are added or deleted. After making changes to a couple of files you can create a commit. A commit is a ‘batch’ of changes, with a name. A repository can be synchronised with a service like Github.
An important concept in git is the branch. A branch is a parallel version of the repository. When you are working on a ‘branch’, you can safely make changes without affecting the main repository. When you are done with your changes, you can merge the branch back into the main repository. This merging happens on Github using a pull request. During a pull request you request a review by other developers of the changes made in the branch, and whether or not they conflict with the main branch.
How to use with CoreConnect
With VSCode
Easiest way to use git for beginners is to use VSCode. First make sure VSCode and git are installed (see guide below).
0. Install git and VSCode
1. Create a local instance of core-connect repository using terminal
# Create local instance of core-connect repository# 1. Navigate to the folder you want the repository to be incd ./Developer
# 2. Clone the repositorygit clone https://github.com/rb2-bv/core-connect.git- Open the repository in VSCode
# 1. Navigate to the repositorycd ./Developer/core-connect
# 2. Open in VSCodecode .
3. Create a branch for making changes
In the bottom left corner, click main. This will open up a dialog prompting you to create a new branch, based on main.

3. Make changes to the files
Using the built-in editor, go ahead and make changes to the files.
4. Stage the changes
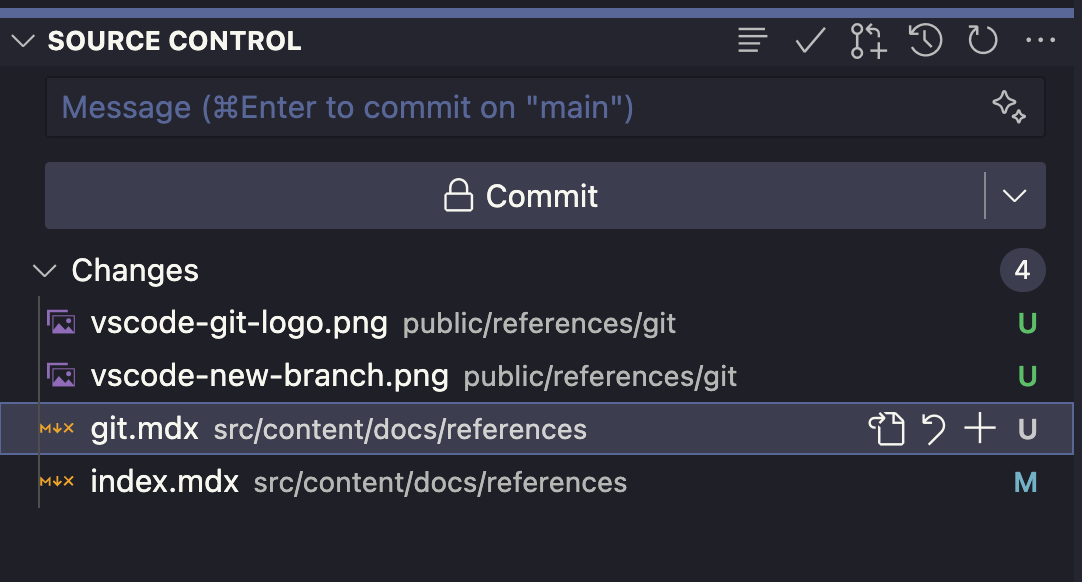
Navigate to the git tab on VSCode, using the sidebar on the left.
![]()
This will open up the source control panel. Here you can see an overview of all files changed. When clicking on each file, you can see which lines have changed. Click the + icon to ‘stage’ the changes, ready for a commit.
5. Commit the changes
Once all files you want to add to the commit are staged, you can write a commit message. This is a short description of the changes made.
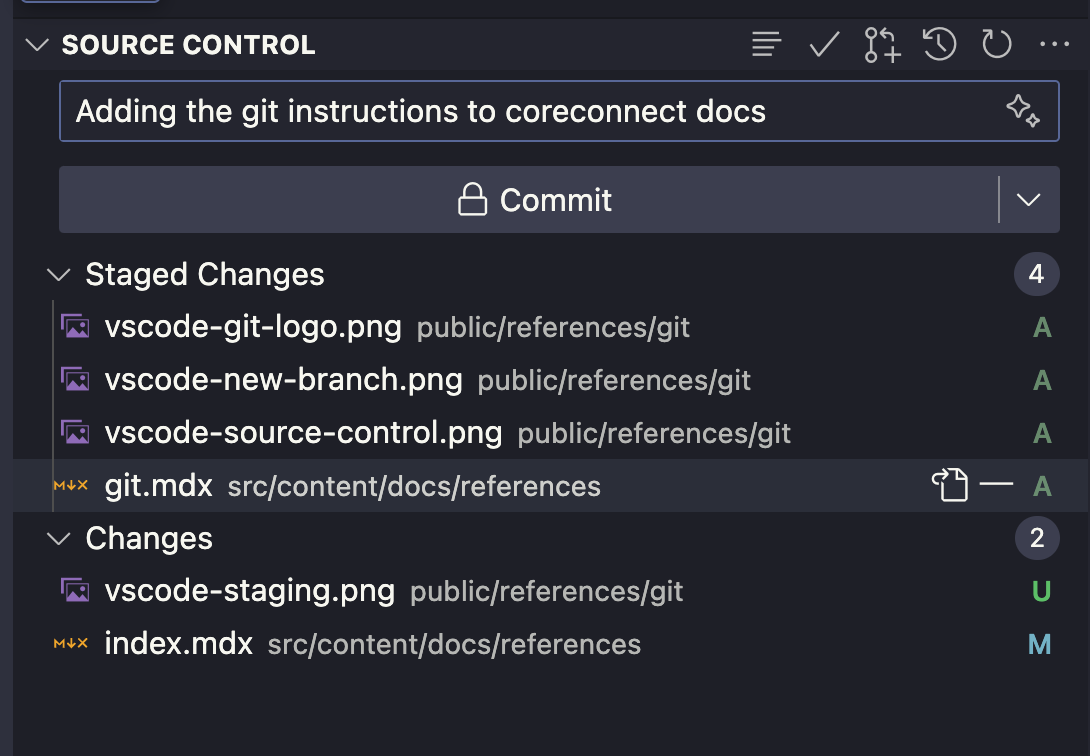
Use the commit button to create the commit.
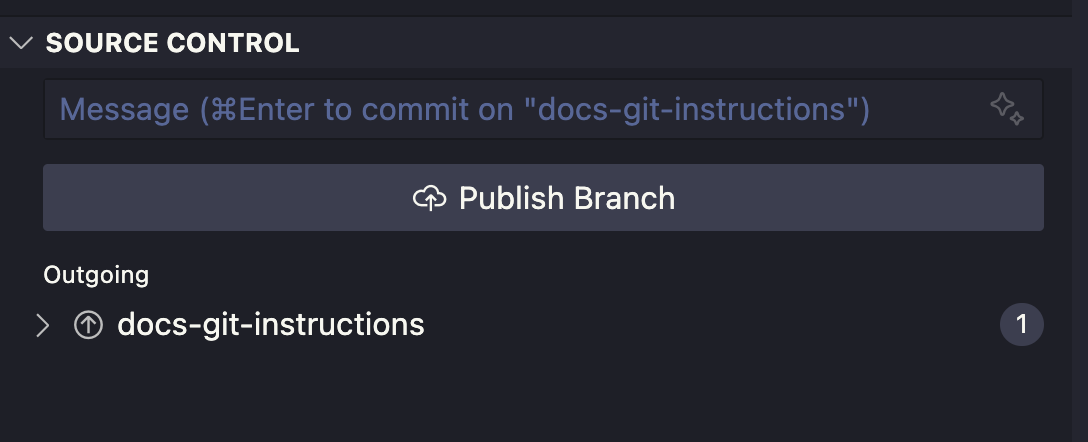
6. Push the changes
In the source control panel, a new button will appear, publish branch. This will push the commit and branch to the core-connect Github repository.
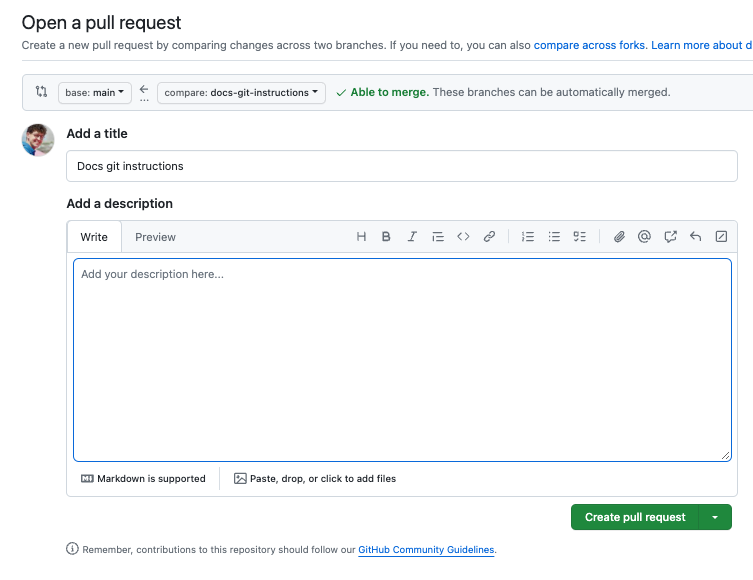
7. Create a pull request
After having pushed the changes, you can create a pull request on Github. You will see a prompt to do so on the main repository page.
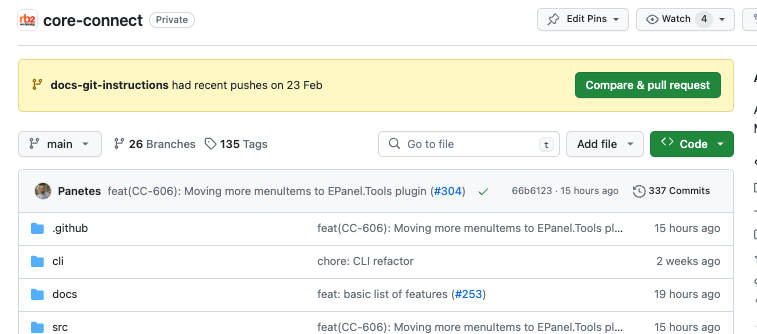
The button Compare & pull request will open up a simple form, for you to specify the title, and description of the changes made. Use the button Create pull request to submit the pull request for review. The rest happens automatically.
8. Continue working & syncing
While the pull request is not yet merged, you can continue working on the branch. Be sure to always keep an eye on incoming changes. Fetching these changes is called pulling, and is most easily done in VSCode with the sync button in the bottom left corner.

9. Switch branch back to main
When you’re done with your branch, you can switch back to main by clicking the branch title in the bottom left corner. This will open up a dialog, allowing you to pick the main branch.
With CLI
If you are more comfortable with the command line, you can use the terminal to interact with git.
# Cloning repositorygit clone <repository-url>
# Pulling in latest changesgit pull
# Creating a branchgit branch <branch-name> #orgit checkout -b <branch-name>
# Switching to a branchgit checkout <branch-name>
# Creating a commitgit add . # If you want to add all changesgit add <file> # If you want to add a specific filegit commit -m "Your commit message"
# Pushing changes to Githubgit push
Reference
Installing git and VSCode
On Mac the easiest way to install is through Homebrew, a tool for easily installing apps on Mac. If not installed follow these instructions.
Once Homebrew is installed, you can install git and VSCode using the following commands:
# Install gitbrew install git
# Install VScodebrew install --cask visual-studio-code